
Your Kenmore electric dryer not heating might be due to a faulty heating element, a problem with the power supply, or damaged timer contacts, among other causes. Most likely, a blown fuse or an ignition system problem causes your Kenmore gas dryer not to heat.
According to the American data analytics, software, and consumer intelligence company, J.D. Powers survey 2018, Kenmore is the best brand in the clothes dryers category. However, the dryer could still have a few issues after years of usage, just like other electrical equipment.
While there are several causes for your Kenmore dryer not heating, rushing to get a new one is not always necessary because you can quickly solve the problem most of the time.
How can I troubleshoot a Kenmore dryer that is not heating? You shouldn’t fret if this is the question you’re asking. I provide some Kenmore dryer troubleshooting tips in this article.
I explain the causes and give solutions to your dryer’s power supply failure, blocked vents, burned-out heating element, or the dryer timer contacts not working. Ultimately, I will answer some of the most commonly asked questions about a Kenmore drier not heating.

Why Is Your Kenmore Dryer Not Heating?
Kenmore electric dryers fall into elite and non-elite categories. Although they both perform the same task, the elite versions, which differ primarily in their superior materials and design, have extra features.
Therefore, whether you have the standard Kenmore dryer or kenmore elite dryer, not heating, the causes and solutions are likely related. Below are some common causes of your Kenmore dryer failing to produce heat.
The Dryer Has A Power Supply Issue
The high-voltage Kenmore dryers need 220-240V to operate. A lower voltage wall outlet, damaged power cord, or tripped circuit breaker are three power-related problems that can prevent your Kenmore dryer from heating.
How To Fix
To check and fix a power issue with your Kenmore dryer, follow these steps:
- Check if the power cord has visible damage, such as threadbare wires or melted insulation. These damages can cause your dryer’s cable not to complete the circuit and, therefore, not heat.
- Check if one of the circuit breaker switches dedicated to the dryer has tripped. You will notice it is not in line with the other switches if it has. Flip the tripped switch back on.
- If none of the two problems above is the issue, test the wall power outlet to check if it sends 240 volts to the dryer. The motor will run if your dryer is connected to a 120V outlet, but the dryer won’t heat.
Below is a video from the YouTube channel Jim Hilt with instructions on how to perform a voltage check:
The Dryer Vent Is Blocked
A dryer vent removes excess heat from the dryer to prevent overheating and possible fire accidents. The vent also removes excessive moisture and lint from the drying drum. Besides making the dryer fail to dry clothes, a blocked vent can cause overheating and blow the thermal fuse.
Your Kenmore dryer has an indicator that blinks when the vent is clogged. However, if the indicator is not blinking, the dryer cycles leave clothes not dry, and the dryer seems not to get hot; usually, a clogged vent is the problem.
You can also run your dryer on high heat and place your hand at the outside vent to see if you will feel hot air coming out. If not, the vent is clogged and needs cleaning.
How To Fix
Follow these instructions for clearing a clogged dryer vent:
- Cut off the power to the dryer and unplug it.
- Pull the dryer away from the wall and carefully disconnect the vent from the hood at the back of the drum.
- Insert a vent-cleaning brush into the tubing to loosen the lint and debris.
- Vacuum the vent to eliminate dirt that didn’t attach to the brush.
- Repeat steps 3 & 4 at the other end of the dryer vent outside the house.
- Reattach the clean vent to the hood and push the dryer back to its usual position.
- Plug the dryer cord and turn on the power, then do the hand test to see if the tube is venting as it should. Your dryer should send moisture out of the drum and heat up to dry your washing.
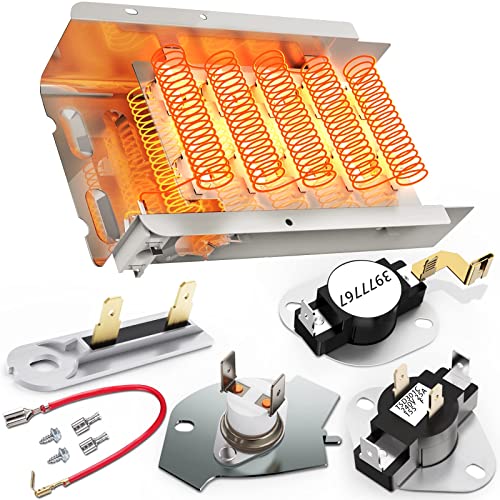
The Heating Element Has Burned Out
The heating element in your Kenmore dryer warms the air before it is sent to the drum to dry your clothes.
The heating element can blow out after consistent usage or following a short circuit. Your dryer won’t heat up in that case, and you will need to replace the element.
How To Fix
You can test and replace a Kenmore elite dryer heating element following these steps:
- Unfasten the mounting screws on the heating element with a quarter-inch nut driver and take the element away from the heater box. The element sits on the lower part of the casing that completes the burner duct or heater box.
- Check if the element sports breakage or burn signs. If you can’t tell by just looking, proceed to test the heating element for continuity.
- Take a multimeter and rotate the dial to the lowest ohm reading. Place one lead of the meter on one of the heating element terminals and the other lead on the other terminal.
- A 0-50 ohms meter reading indicates that the element has continuity. However, if no change happens on the multimeter display, the element is burnt, and you should replace it. Proceed with the replacement steps.
- Take the high-limit thermostat fitted into the old heating element and fix it on the new element.
- Fit the new element onto the lower heating box space where the old one was so that the mounting screws’ holes are aligned. Fasten the mounting screws.
- Reconnect the heating element wires ensuring each wire goes to the right place. Note that the wrong connections can damage the new element.
- Fit back the outer cover and thread the screws.
- Reconnect the dryer to the wall plug, turn on the power, and test if the dryer resumes heating.
The Dryer Timer Contacts Aren’t Working
Your Kenmore Elite dryer timer controls the drying time according to the set cycle. The timer is in the control panel and set by turning the knob. A small motor at the rear of the control panel controls the dryer timer. During a drying cycle, the internal cams of the timer open and close contacts or switches to operate the dryer components.
If the timer contacts malfunction, your dryer will either not start or not heat, and the timer won’t advance.
How to Fix
You can replace a Kenmore Elite dryer timer by following these steps:
- Turn off the power to the dryer and unplug the cord.
- Pull off the dryer timer knob from the control panel.
- Unthread the screws mounting the control panel rear cover and put it aside.
- Disconnect the timer wires. Be sure to note the position of each wire so you can reconnect them correctly later.
- Loosen the timer mounting screws and remove the timer.
- Fix the new timer where the old one was and tighten the mounting screws.
- Correctly reattach the timer connection wires.
- Fit the back panel and thread the screws.
- Reattach the timer knob at the front of the control panel.
- Reinstall power to the dryer and test if the timer starts moving and the dryer resumes heating.
Why Is Your Kenmore Gas Dryer Not Heating?
The cycle of a Kenmore gas dryer is shorter than that of an electric dryer because of how rapidly it heats up. Gas burns inside the gas dryer burner, rapidly converting to heat.
Finding your clothing still damp after a cycle using your Kenmore gas dryer indicates it is not heating. Even if your garments aren’t wet, they might not be completely dry.
Below are the two most common causes for your Kenmore gas dryer not heating and their solutions:
Blown Thermal Fuse
The gas dryer can continue spinning if the thermal fuse hasn’t blown but it won’t heat. In some circumstances, the gas dryer won’t run at all.
On the bottom left of your dryer, behind the back panel, next to the exhaust duct, is where you’ll find the thermal fuse. Lint clogging your exhaust ducts is the most likely reason for a blown thermal fuse.
A blockage in the air ducts leads to overheating, and the thermal fuse shuts off the circuit to stop the dryer from causing a fire.
Other factors that can cause the thermal fuse in a gas dryer to blow off include a clogged blower wheel, a broken Hi-Limit thermostat, or a tripped thermal cut-off.
How To Fix
- Remove the two wires connected to the thermal fuse.
- Touch the probe leads of your multimeter to the terminals of the fuse where the wires were attached while set to measure resistance (Ω).
- The fuse is OK if your multimeter displays a reading close to zero ohms (0Ω). Reconnect the cables if this is the case.
- The fuse has blown if the multimeter indicates no current flowing or if it shows OL or 1.
The YouTube channel Sears PartsDirect shows how to replace a Kenmore Gas Dryer Thermal Fuse below:
Note: A dryer thermal fuse frequently blows if the exhaust vent is blocked. Therefore, you should check that the dryer vent is clear and unclogged before turning on the dryer after replacing a blown or tripped thermal fuse.
Ignition System Failure
The gas valve of the Kenmore gas dryer, which is two valves in one, ignites the gas and keeps it from escaping when it shouldn’t. If the circumstances are ideal for igniting the gas, the second valve opens and lets gas flow to the burner.
Usually, an igniter lights the gas. The gas flows when the igniter is hot enough, which is determined by a flame or radiant sensor. As long as the gas burns correctly, it can continue to flow. To see if the ignition process works properly, you can look via a tiny observation port in the front panel of your gas dryer.
How To Fix
Here are the steps you can follow to fix this problem
- The gas valve coils are broken if the igniter glows briefly (approximately 2 minutes) and then goes out without lighting any flames.
- The flame or radiant sensor is not working if the igniter ignites and the flame doesn’t start for an extended period (greater than 5 minutes).
While the above two are the most common reasons, I have covered the other causes in another article focusing on the Kenmore gas dryer not heating.
Conclusion
I hope that by now, you have resolved your Kenmore Elite dryer troubleshooting issue should be resolved.
If you have replaced your dryer’s power problem, timer contacts, heating element, and dryer vent blockage or the ignition system fixed, but the problem still lingers, maybe it’s time to call a professional
Frequently Asked Questions(FAQs)
What are the possible reasons why my Kenmore dryer is not heating?
The possible reasons for your Kenmore dryer not heating are:
- A blown thermal fuse.
- The dryer’s centrifugal switch is faulty.
- Failed gas valve solenoids.
- The igniter for the gas dryer is not working.
- A burned-out heating element.
- A defective timer.
- A malfunctioning cycling thermostat.
How much does it cost to repair a Kenmore dryer that is not heating?
The cost of repairing your Kenmore dryer will vary depending on what you need to fix. Depending on the model, a heating element might cost anywhere from $20 to $120. A new thermal fuse for a Kenmore HE2 dryer typically costs $50.
The cost of labor ranges from $50 to $200 on average. The gas valve solenoids from Kenmore are about $11 for a pair. The igniter for the gas dryer ranges in price from $13 to $25. While the cycle thermostat is $7, and the Kenmore dryer timer is $85.